Good Laboratory Practice: Culture Media Sterilization
By: Priorclave North America
Category: Lab Autoclaves

Too many labs belatedly discover that their culture media sterilization cycle is not actually sterilizing the load. Yes, the autoclave is reaching 121ºC and holding that temperature for 20 minutes. But the devil is in the details: The readout on your autoclave shows the chamber temperature, not the load temperature. That difference is minute when it comes to many loads (like empty glassware or pipette tips). But it can be huge during a culture media sterilization cycle. “In some cases,” explains Philip Berriman, “once the chamber reaches 121ºC, it’s another whole hour to reach sterilization temperatures in the load itself.”

Good laboratory practice examples: Does your culture media sterilization procedure get consistent and reliable results?
Berriman is an instrumentation technician at California State University (Fullerton), where he supports a large number of research labs. Subsequently, Berriman has run many tests exploring how different load types behave in the sterilizer. Berriman has confirmed that, especially with larger autoclaves, the thermal inertia created by varying load types often has an enormous impact on the total cycle time needed to reliably sterilize the entire load.
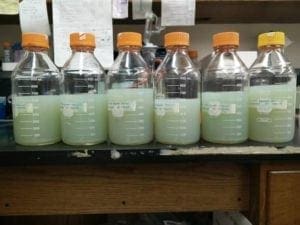
“For example, if you pack a 320 L autoclave with one-liter bottles of media, it adds another whole hour—beyond the initial 20 minutes that it would take to run a load of dry beakers—before spores are killed in a spore test. It takes that long for the fluid to heat up, because you have so much fluid, and water heats really slowly.”
Good Laboratory Practice: Three Culture Media Sterilization Tips
Being aware of the outsize impact of thermal inertia (especially when processing fluids) is an excellent start. But good laboratory practice hinges on consistency in every aspect of your culture media sterilization program:
1. Validate Your Loads Regularly
If you regularly run a full load of growth media, it’s worth validating your cycle at least once each quarter:
- Load your autoclave up precisely as you would when actually sterilizing growth media
- Place a spore test vial (or other biological indicator) near the center of mass of the load (or as close as practical)—ideally in one of your flasks of media
- Run your standard culture media sterilization cycle
- Test your biological indicator ampoule. If it still shows biological activity, then something is amiss.
2. Always Use a Deep Solid Metal Tray with at Least One-Quarter Inch of Water in the Bottom
Sooner or later, a flask will crack or burst or your growth media will foam more than expected or boil over. It’s easy to dump out and rinse a tray. It’s hard to clean gummy growth media from an autoclave’s chamber and plumbing. Using a tray with a quarter inch of water in it doesn’t just make for easier cleaning of the tray. The water bath acts as a buffer, smoothing out your temperature and pressure ramps. This minimizes evaporation and helps prevent pressure building up in your flasks.
3. Always Assume the Worst
The core good laboratory practice: plan for disaster. Run every load with the assumption that some bottles will boil over, others burst, and some will pressurize, ready to burst when jostled. Make sure your tray is deep enough to accommodate the water bath, all of the liquid from all of the flasks, and all of the broken glass—without overflowing. Wear personal protective equipment (PPE) every time you use the autoclave: Buttoned lab coat and safety glasses at all times, rubber apron and heat-resistant gloves when unloading potentially hot loads. Burns during autoclave unloading are not uncommon and can be severe.

